Regardless of how big or small, new or old your garden is, there are always opportunities to add your own touch to your yard. In this post we’ll explore 18 DIY landscaping ideas you can follow to improve your garden.
Many homeowners want to put their mark on their property – not just to improve the look and feel of the garden, but to push their abilities and learn new skills.
These DIY landscaping range from the simple to the strategic, with some nice tips thrown in to help you save time – or money – all while ensuring you end up with something perfectly suited to your house, garden and lifestyle.
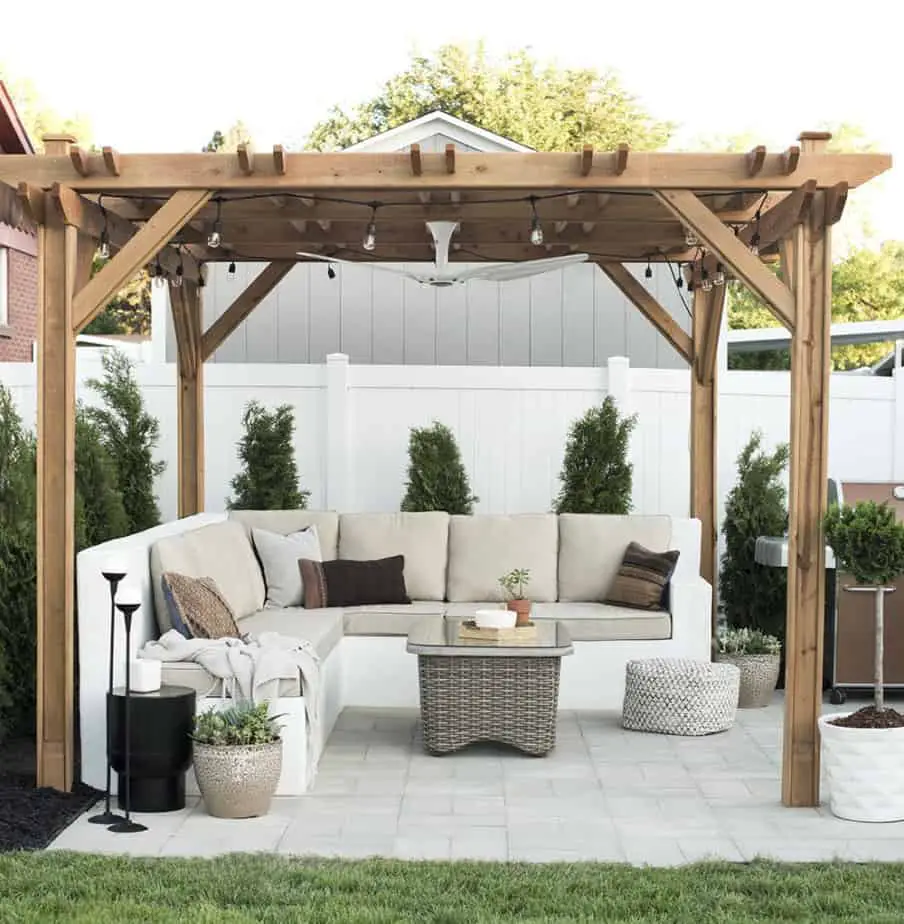
Feature Image above – DIY rendered seat by Sarah & Emmett at Room For Tuesday. Learn How To DIY here. Image from roomfortuesday.com
1. Plant Small & Allow Your Young Plants To Grow Into Your Garden
While it may be attractive to go out and buy some beautiful, more mature plants and trees to till out your garden, a little patience can go a long way.
If you opt for the cheaper, younger plants, and plant them the recommended distance away, you will save a lot of money.
This works not just in the short term – when you buy the plants – but over the first few years as well. Should a particular plant be struggling, you are more likely to be OK with replacing it with another similar plant, or perhaps changing things altogether.
Because you paid less initially, you’re unlikely to fall into the sunk cost fallacy, trying to make sure something works simply because you invested a lot up front.
Buying small and cheap may take a few years to catch up to more mature options, but you can invest the money you save into other, more interesting or desired options as well.
2. Buy Your Plants During The “Off Season”
A related tip to buying your plants small is to buy them at the end of the spring or summer growing seasons. They may sit small for a little while, but you will save a decent amount of money through, once again, being patient.
This is more effective if you have areas to store some plants (assuming you can’t plant them straight away) or can protect those that you do. Particularly for young saplings, spending some money on protective covers and stakes will still prove cheaper than buying the more mature options.
3. Artificially Add Height By Raising Your Ground Level
If your design includes layers of plants, or plants at different eye levels, instead of paying for larger options to fill that zone, try to raise the ground level instead.
Consider creating raised garden beds, containers, maybe old bathtubs or earth berms/mounds to prop up your plants. That way you can still opt for smaller, cheaper plants, and in just a few years you won’t be able to tell you helped them out a little bit in the beginning.
4. Add A Climbing Support Like A Trellis Or Arbor
Nothing new here, but an excellent, cheap trick nonetheless. If you want to add foliage, flowers or blossoms higher up but can’t afford the pretty trees, try using a simple support for climbing plants.
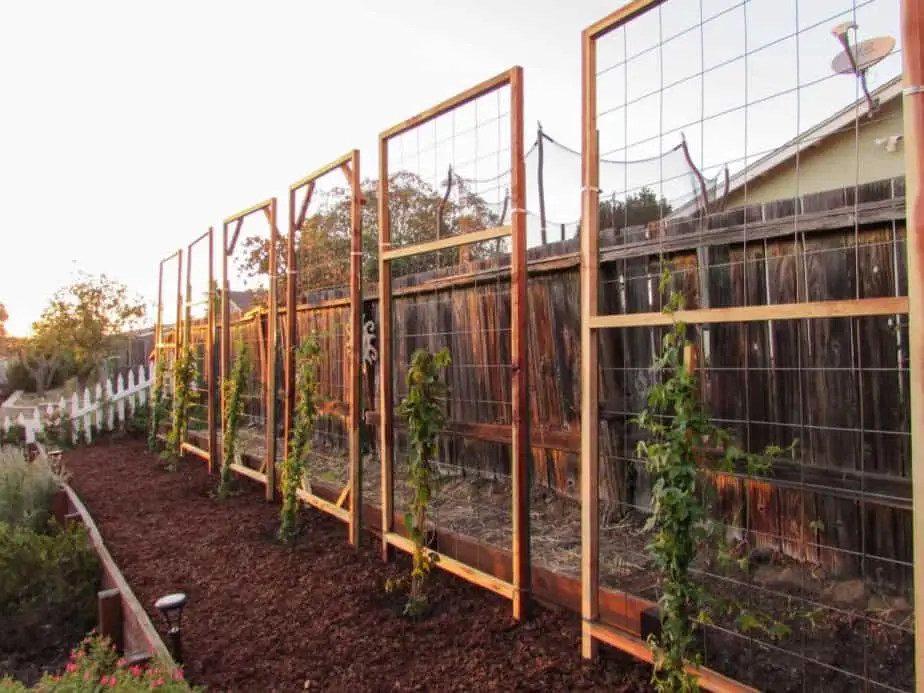
Once again, you may have to wait a few years for the plants to reach the level you like, but after that you’ll have a gorgeous vertical show that will be the envy of many.
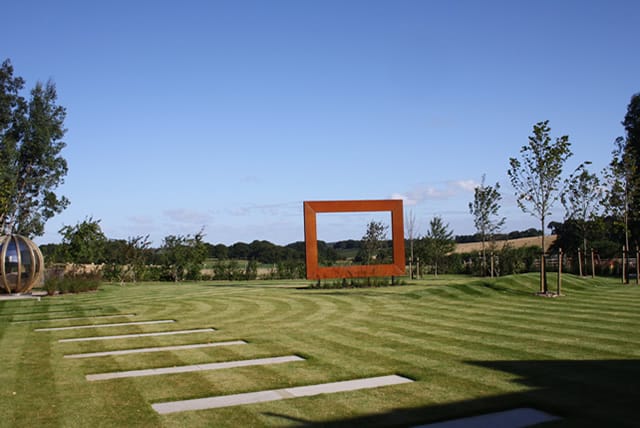
5. Place Strategic, Tall Items To Catch The Eye And Add Depth
If you can’t, or don’t want to, place plants or trees as focal points in your yard, you can opt for things like sculptures (even cheaper if they’re homemade!) or an arbor – like we touched on above – to add a tall, vertical element to your yard.
The bonus here is you don’t need to wait for them to reach max height – they’re tall straight away. Then your smaller garden can grow and fill out to ‘mesh’ with these vertical elements.
6. Take Advantage Of External Focal Points Or Views
Rather than spend a lot of money creating your own focal points, look at what you can see from your house and yard. If there are any nice trees, buildings or views outside your yard, why not take advantage of them?
You can easily do this by keeping the line of sight open to those things – not placing objects in front of them. Or you can place specific viewing points in your design. Or even ‘framing’ them in some manner – between vertical elements like trees, or a sculpture of some kind.
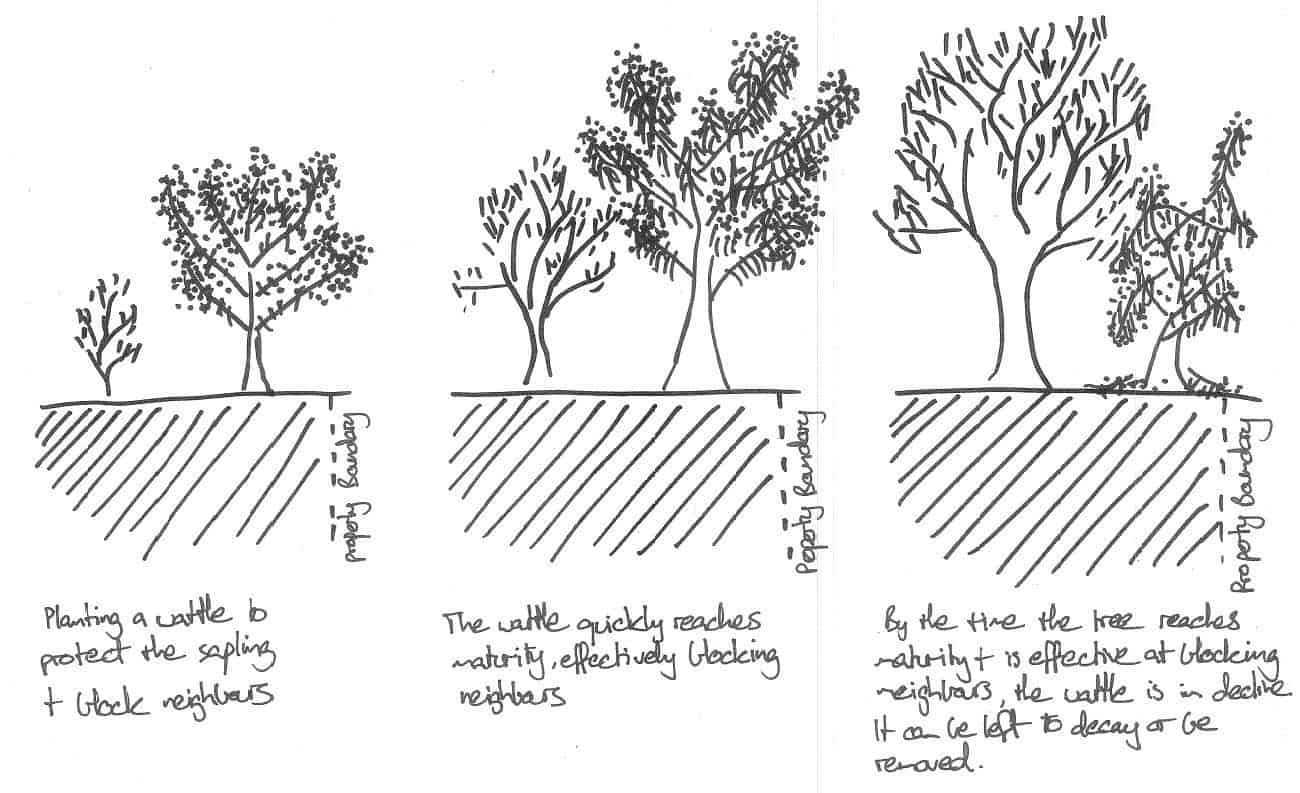
7. Have Fast Maturing Plants Protect Slow Growing Plants To Quickly Add Privacy
Sometimes the most attractive screening or background plants are also some of the slowest to grow. This isn’t great if you quickly want some privacy.
One approach is to set up a kind of succession system, where you plant something that will reach a decent height in just a few years – enough to provide some coverage and privacy.
At the same time, you can have your preferred slow growing option behind, in front or between the faster choice. This gives those plants time to mature, and the fast maturing plants can also protect them from the worst of the weather.
After your slow growers reach a suitable height, you can look to remove the fast growers – leaving you with a lovely mature set of your preferred plants.
8. Choose Groundcovers To Reduce Plant Cost & Cover More… Ground
An obvious approach that is becoming more popular as people look to reduce the amount of resource hungry lawn they have to maintain.
Having different groundcovers dotted throughout your design means you reduce the number of plants you need to plant (saving $$$) and you can introduce more visual and textural variety into your design as well.
9. Replace Plant Areas With Other Materials Like Rocks, Stones, Sand, Gravel Or Mulch
Just like using groundcovers to cover more area with less cost, consider designing areas with materials other than plants. It’s common to use things like gravel or stones in more utilitarian spaces like down the sides of houses, but you can find plenty of opportunities to use them throughout the yard.
Maybe instead of a garden bed filled with various plants, have a mass planting of one feature plant and use stones, mulch or gravel beneath it. Or in areas that are out of site, opt for larger swathes of mulch.
10. Use Mixed Materials Across Different Spaces To Add Interest
Another common tactic is instead of keeping the same material across a space, mix and match to add some cheap visual interest. Have paving areas extend into lawns or garden beds. Add paving stones to gravel paths. Include rockeries in garden beds, as a low maintenance feature.

Image from hometalk.com
11. Add Off The Shelf Items As Part Of Your Design
Most people make the mistake of trying to design one space or area at a time. This leads them to start little projects they can finish quickly. While they may look good on their own, they don’t match or connect with anything else.
The solution is to keep them in mind right from the start. Things like fire pits, water features and even ponds can be purchased off the shelf.
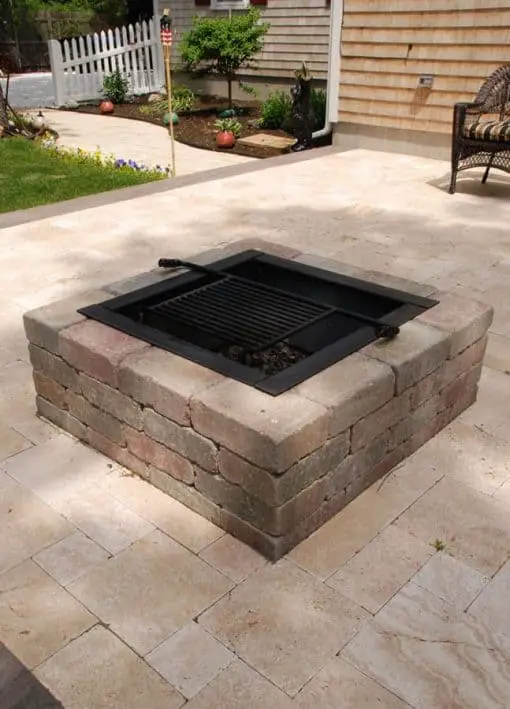
Image from stonewoodproducts.com
As you develop your design, do some research around what products you like, are in your price range, and if you are able to install them yourself. Then, build them into your overall design.
That way, even if you do start your build with those spaces, you know they will mesh with the other areas around them.
12. Plan Ahead & Build In Stages
As we mentioned above, if you have a complete design to work with, you can easily plan ahead and prepare your construction well in advance.
You can order the correct amount of materials, prepare your yard, plan your days and do all the things you waste time doing during the build, in advance.
You need to get to a relatively “finished” stage in your design process to ensure quantities and measurements are accurate, but it’s much cheaper to spend time making changes on paper than it is in your yard.
13. “Plant” Ahead – Propagate Plants Around Your Garden
Planning ahead can be more than just what you plan to build and when. It can also relate to “planting” ahead – where you start with an initial garden bed filled with plants that match your ‘style’ or aesthetic.
After the first growing season or two, you take cuttings, seeds or simply propagate and split them and spread those items to other parts of your garden.

This works in tandem with planning ahead, as you can build a “seed” bed in your first phase. As you wait for those plants to grow and mature, you can work on other parts of your garden. By the time those next sections have been built, your plants may be ready to go.
This takes patience, but can save you a tonnnnnnne of money in the long run. Plan it right, and you basically only pay for your first set of plants (plus any unique or new additions along the way).
As I suggested, this is also a great way to maintain a particular style or aesthetic across your garden. Having similar colours, shapes and textures across a yard in the form of plants and materials is a great way to unify a garden.
If you want to learn more about different ways to add interest, unity and even contrast to a design, read my Landscape Design Theory and Landscape Design Principles articles.
14. Seek Out & Use Recycled Or Upcycled Materials
If you plan to build over a period of time, it can be worth keeping your eye out for people selling materials cheap or even free. If you have space, you can nab these and store them for when you begin building your garden.
This approach works much better if you already have a relatively finished design, as mentioned above. Then you can be more targeted and focused in what you are looking for and you know roughly how much of each material you need.
15. Find Room For Old “Feature” Items
Along with recycling materials, you may want to add old items in certain places in your design. Bathtubs, sinks, arbors, bicycles, fences, even shovels or tools can add intrigue and be incorporated into an interesting space. And, once again, often for cheap or even free.
16. Hide The Ugly To Make It More Pretty
If you have things you cannot move – bin storage, compost bins, pumps, utility units etc. – find ways to hide them from sight. This can dramatically improve the quality and feel of a space. In some ways it’s addition by subtraction.
Look into the best methods to use to hide things like utility boxes and air conditioners in my articles here, here and here.
17. Block Out The Noisy To Improve The Ambience
Just as you want to visually remove the unsightly elements, reducing external noise coming into the space can be just as useful in helping to improve the ambience of a space.
Whether you put up a physical barrier, or add something like a water feature to help drown out external noise, anything you can do to reduce unwanted sounds and invite more natural sounds will really add value to your space.
Read more on how to best block out noise here.
18. Add Lighting To Your Design Right From The Start
As I’ve mentioned a few times, having a design you can work off will really save you time and money in the long run. And a great thing to include from the start is lighting. As you design, research what kind of lights you want in different spaces and develop your design around them.
Lighting along paths, steps, entertaining spaces and even to highlight feature elements in your garden are often simple kits you can install yourself. And having planned your layout from the start – where you plan to place the lights, run the cables and connect everything – will give you a really professional quality finish for a DIY price.
All of these ideas are simple and can be effective in the right spots. Ultimately, as I mentioned multiple times, everything becomes much, much easier when you have a plan to work from. If you want to learn more about how to create a DIY garden design, you can learn more here.