
A Landscape Design Plan is a plan of your final design. It should contain as much information as possible so someone referring to it knows who does what.
You want it to look appealing – as though you were presenting it to sell it to someone. But, you don’t want to clog it up with unnecessary information. It can be a fine balance to get right.
Basically, if I hadn’t seen the design before, I want to be able to understand what each space is purely by looking at the sketching/drawing you’ve done. let’ explore this in more detail, to see how you can straddle that line.
Prerequisites
Remember, this is a finalised version of your design. You (hopefully) have been through the whole landscape design process and refined your plan to get to this point.
So by now, you should have the following information:
- Your final ‘draft’ plan – the one you will refer to as you draw this version
- An idea of materials, dimensions, areas of spaces and other decisions around components within your design
- If you don’t have all the specifics down, that’s OK – you just need to note what needs TBD at a later point (maybe with expert advice or input)
- Who you think will supply materials
- Who you think will build each part or space
I prefer to have a separate plan to add measurements and areas to. Depending on how busy your landscape design plan is, you can do the same, or add those details to this one.
How To Create Your Landscape Design Plan
Start by getting a new piece of trace paper. If you have already created a straight, scaled draft plan, you can trace over that one. Otherwise, you’ll be drawing from scratch.
Outline your house (doors and windows), property boundaries, easements and any existing items that will stay in your design. Use a nice black pen – something bold and easy to see.
You don’t need to show things like neighbouring properties or items. These are useful to know during the design process, but given this is your final plan, you don’t need to reference them anymore.
You can scan/make a copy now if you like – just in case you make a mistake, you don’t have to redo this outline again. Something we’ll do again once you’ve created your ‘skeleton’ plan.
Creating Your ‘Skeleton’ Plan
A skeleton plan is a bare bones outline of your design. Once you’ve created it, you can copy it a few times to use in your other plans – like a measurements plan, planting plan, lighting plan and more.
Creating it is easy – start drawing out the outline of your design. The main elements of spaces – paths, decks, garden bed edges etc. – anything that indicates a change in material or moving from one space to another.
Make sure it’s to scale, with straight lines and nice clean curves. Add in your scale and cardinal (North or South Arrow) as well. Hopefully your base plan has this, so you can copy it straight to this landscape design plan.
Note: You don't need to have tiny tolerances here - this isn't an engineering project. This plan needs to be accurate, but understand things will probably change slightly during construction. So don't agonize over making a curve exact. Even if you draw it slightly out of line, you will add measurements to it - and these are what landscapers/ builders should refer to. And even those can be tweaked as you build...
As I said, copying your skeleton plan is a good idea, before you add more detail. With this plan created and multiple copies printed, you save time it you make a mistake – or want to create other plans I outlined above.
Adding Detail To ‘Invoke’ Each Space
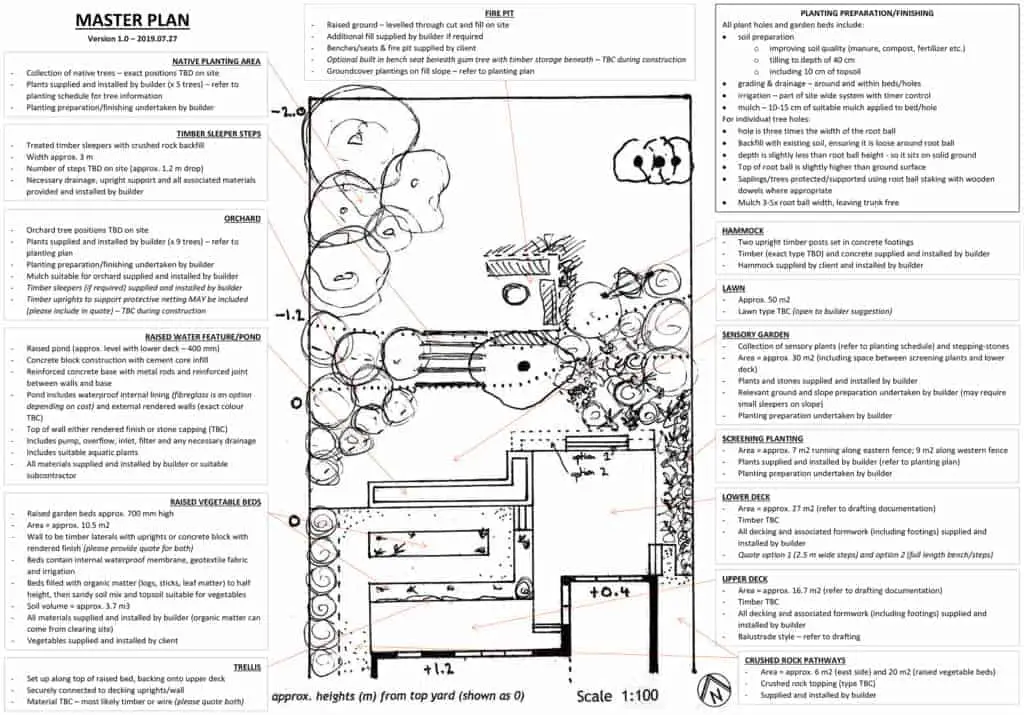
You can see from my version at the top of the page, I outline each space, but then draw some basic sketches to indicate differences between spaces. Things like materials – gravel, timber deck, lawn, garden beds etc. – or specific plant shapes/ outlines to suggest what kind of garden bed it may be. The plants aren’t in their exact positions – again, they’re just indicative.
If someone glances at this plan for the first time, they should be able to roughly figure out what most areas are. And if you want to pretty your plan up a little, you can take your time sketching and colouring in different areas. Before you do add colour, or additional detail, make a copy, just in case you make a mistake.
Once you’ve finished adding your detail to the plan – and you think it does enough to suggest what each area is or does – you need to make another copy. This time, we want to scan it to your computer and put it into a Word document – or a similar program that allows you to add text boxes you can move around. This is how you can easily add annotations – and more information – to your landscape design plan.
Annotations – How To Add Them To Your Page
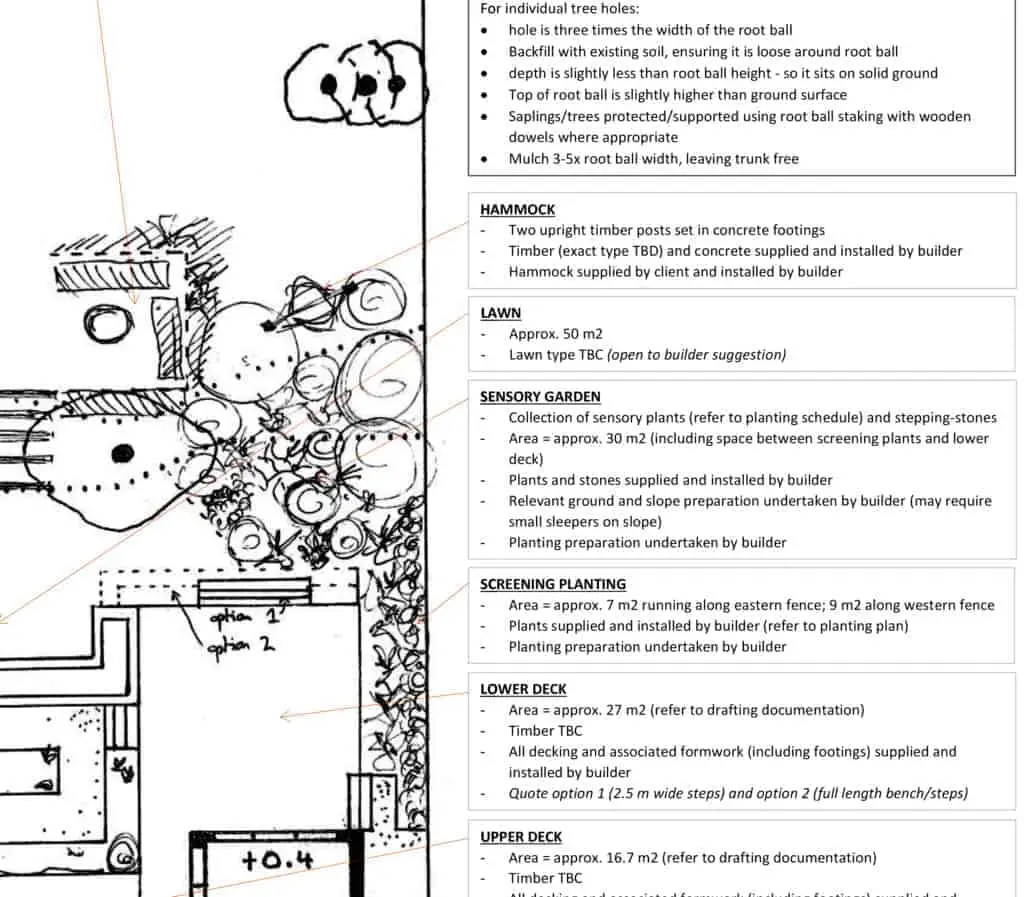
You can see in the image above I have a number of little boxes with notes in them, pointing to specific parts of the plan. These annotation boxes provide (in theory) all the information someone needs to know to prepare to build a space.
If you do have separate measurement and planting plans, builders can use that information during the construction process. If you don’t, you will want to add that information to this landscape design plan.
Let’s look at how to add your plan to a word document, and add annotations and arrows to it.
1. Scan Your Plan And Add It To A Word Doc
I can’t help you with your scanning set up, so you’ll have to do that one on your own. If you’re not sure, try Google. Once you have your landscape design plan on your computer, it’s time to open a Word Doc (or your equivalent).
Create a new document and go to the Layout tab along the top. Depending on how big your plan is, and how it should be oriented, you can change your layout to be portrait or landscape. Remember, you want to have room around the sides to add text.
You can see in my plan, although it is a ‘portrait’ plan, I put it on a landscape paper, so I can add notes around the outside.
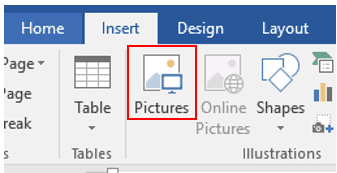
With your layout set, you want to Insert your picture. Click the Insert tab > Pictures > find your image (wherever it was stored when you scanned it).
Here is the tricky part…
Waaaay back – when you first made your base plan – I recommended trying to pick a scale you can fit onto an A4 or A3 page. Hopefully your landscape design plan hasn’t changed in size – so when you scanned it, it stayed ‘full size’ and wasn’t shrunk.
If that’s the case, you want to ensure you don’t resize your image at all. Although I always suggest referring to measurements rather than try to measure from the page, you still want to keep your plan as close to accurate as possible.
So, all this is to say, insert your image, don’t change the size, and move it into a central position in your page. Now it’s time to add your annotations.
2. Adding Text Boxes For Annotations
Look at the Insert tab again. Towards the right side is a button called ‘Text Box’.
Click that and select the first option – ‘Simple Text Box’. This will open a box on your page – often pushing away your landscape design plan. That’s OK, I’ll show you how to move everything back now.
If you left click the border, a little box should appear next to the top right corner. A new menu will open. Here we want to select something that allows us to move the box around without disrupting other things on the page. I generally go with the bottom right option – ‘In Front Of Text’.
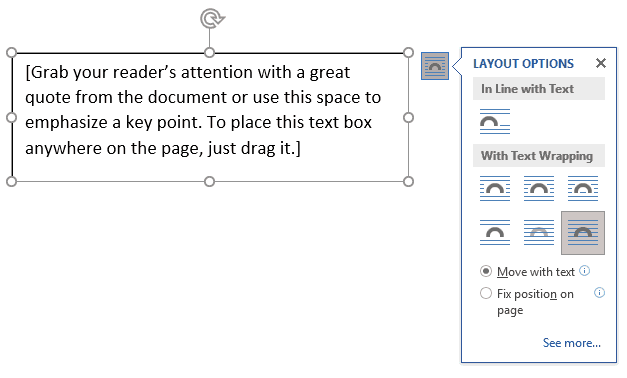
Now when you move it around it will go in front of images. You’ll notice it partially blocks the image behind it – that’s because our box has a border and a background. Let’s look at how to change (or remove) those.
3. Formatting Your Text Box
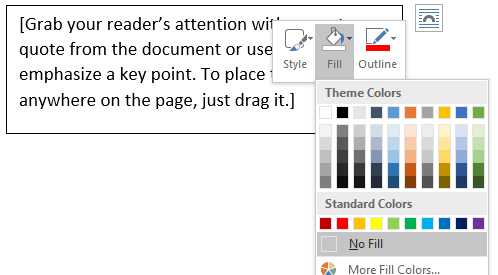
Right click anywhere in the box. This should bring up a menu, including a bit at the top showing ‘Fill’ and ‘Outline’. If you click those little dropdowns, you can hide the fill (by choosing ‘No Fill’) and hide the outline(again, no outline) or changing it’s colour and size.
The last thing you may want to do is change your font size. I prefer smaller fonts, to fit more information in, but you choose whatever works for you. You can always change it later.
You can now position your formatted box anywhere you like, and start to add relevant information to it. And rather than redo this process for each new box, simply click on your first one, copy and paste it. This will keep the same formatting you just developed. Then all you need to do is change the text to outline a new area/ material etc.
What To Add In Your Annotations
The basic rules to follow when annotating your plan are:
- Title the box with the name of the space – activity, feature or garden idea
- Try to describe one space etc. per box
- State the Area, or straight line length, of the space
- State materials – specifics if you know them, TBD otherwise – and who supplies them
- State build/ construction standard – more on this below
- State who is undertaking labour/ installation
- State any preparation or follow up requirements (like excavation, drainage, irrigation or planting preparation)
You can see a lot of this information in the image above. Notice that I haven’t outlined everything in each space. Some need more details than others. And in some I don’t know the specific details – like materials.
Remember, the purpose of your landscape design plan is to provide something a landscaper/ builder can read and provide a reasonably accurate quote from.
More information is generally better, but you have to remember who you would be tendering to. Outlining all the different plant options may not be something a landscaper needs to know, in order to quote. Just the garden bed area and the number of plants may be enough.
Construction Standards
I mentioned above you can outline some basic requirements of the build. This doesn’t mean you need to outline, step-for-step, the construction process. It’s more about ensuring the builder correctly quotes the work. You don’t them to quote the cost of building a deck, only to then add additional costs for footing excavation and construction.
I know this is a trite example – after all, how can you build a deck without including the footings – but it’s more to illustrate you want to include everything in the quote. This is why specifying labour AND supply is useful – you’d be surprised how often this isn’t outlined, and it can come back to bite you.
I’m not expecting yo to know construction standards, so it might take a little bit of research. Google some common approaches to find out material requirements and techniques. Another option is finding your country or states building codes and stating the standard number/ code itself in your little annotation.
Adding this information is one way to cover yourself. You don't want to discover your builder did a subpar job, simply because you didn't clearly articulate an expected standard level. Again, it's unlikely you'd have no recourse should such a thing happen - but if you didn't use a registered builder, who generally have a greater incentive to adhere to standards - you may find out you don't have much to work with.
This is a bit off track, but the basic rule is – if you can find standards, or useful construction techniques, for your more expensive areas – decks, paths, structures, ponds etc. – you can try to include that info, if you have the inclination. And the room in your text box.
Repeat The Process
It wouldn’t be a landscape design activity if you didn’t have to repeat something. In this case you can take your time filling in your boxes, outlining what each area is, how big, materials, who supplies, who installs, and any other info you want to include.
One thing you can do is consolidate similar areas into one box. Instead of a box for each little garden bed, make one larger box, specify the total garden bed area, and describe each position (or point arrows to each).
Once again, think about it from the landscapers point of view. They care more about the total area they need to prepare, drain, irrigate, plant and mulch. Each of those tasks has a rough cost per square metre (or foot). That is generally what they use as a baseline to quote from. So if you have the same ‘condition’, or tasks, across multiple areas, it may be worth combining them into one box and stating the total area. Easier for you, (probably) easier for them.
Once you’ve placed your boxes around your plan, you can start to add arrows to point to each space.
Adding Arrows To Your Landscape Design Plan
Go back to the insert tab, and press Shapes. The dropdown should show a list of shapes. Pick the arrow one.

Click and hold a point on or near your text box, and then drag your mouse to the related area on your landscape design plan. You’ll see the arrow stretch. When you let go, it will stay in that position.
If you want to change the colour and width of the line, you can again right click the arrow and change the outline to whatever you’d like. And again you can copy and paste the arrow, changing the start and end points, until you have linked all your annotation boxes to their respective areas on your plan.
And that’s really it for creating your own final ‘Master’ plan. It’s not a complicated process, but can take time – and be fiddly to produce. If you’re not sure, or scared of adding things like standards and construction information – that’s fine. In that case, stick to the physical things you can outline – areas, materials and the basics of each space.
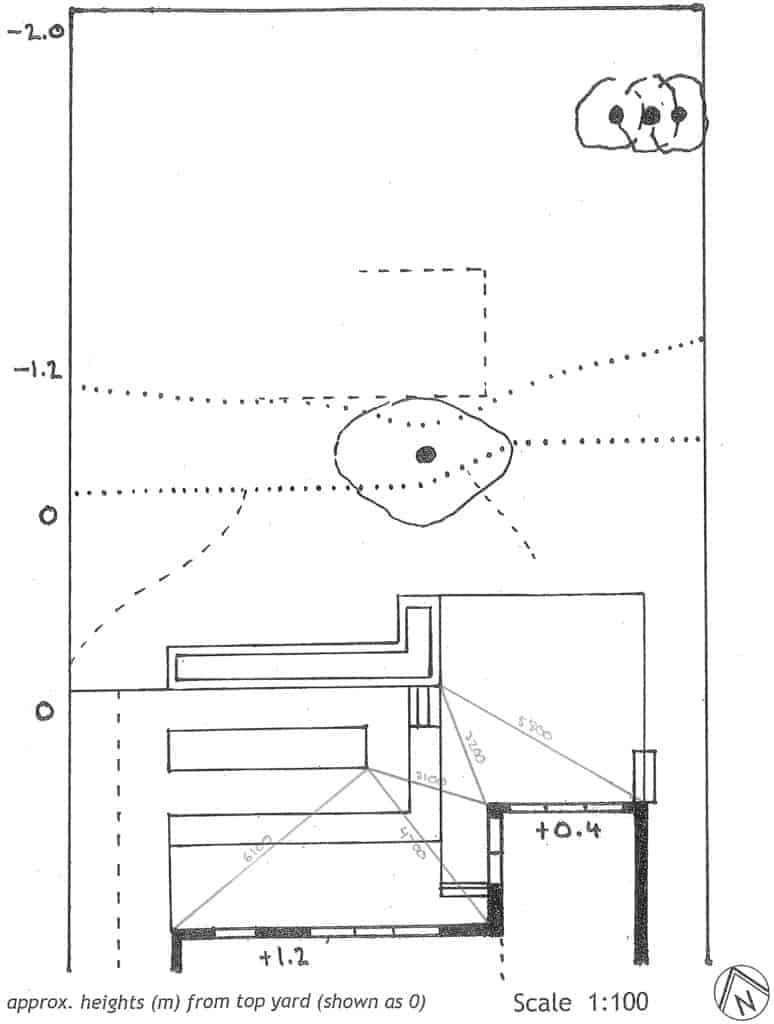
I hope you found this useful, and can successfully put together your own landscape design plan. If you’d like to learn more about other plans, check out how to develop your own landscape measurements plan, planting plan, lighting plan, sections/ elevations or even models (this one is more about using models to design, but if you want to create a ‘final’ model, you can follow the same process).